
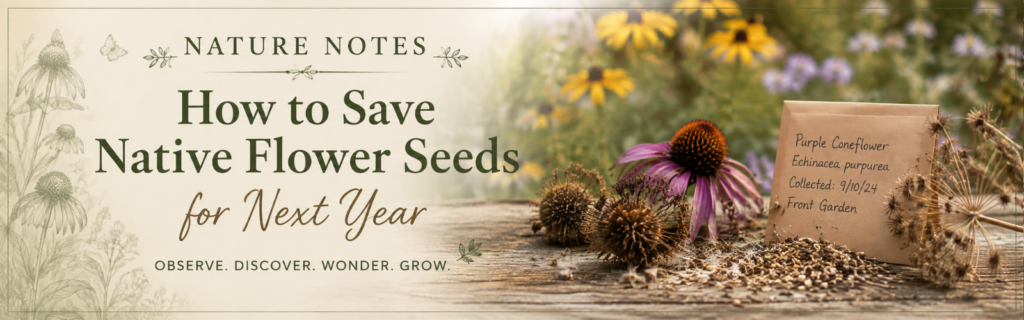
Educational Series No. 6 | Publication Date August 25, 2026
How to Save Native Flower Seeds for Next Year
There comes a point in late summer when the garden begins to change its language.
The flowers are still there, but not all of them are blooming anymore.
Some petals have fallen.
Some stems are turning brown.
Some seed heads are beginning to dry.
And if you look closely, the garden is already preparing for next year.
Saving native flower seeds is one of the simplest ways to participate in that cycle.
It allows you to grow more of the plants you already love, share them with others, and begin new areas of your garden without starting entirely from scratch.
But before collecting anything, it helps to understand what the plant is doing, and when the seed is actually ready.
A Flower Is Not Finished When the Petals Fall
We often think of a flower as being “done” once the bloom fades.
But from the plant’s perspective, something important is just beginning.
After pollination, many native flowers begin producing seeds inside the structures left behind.
The colorful petals disappear, but the seed head continues developing.
Purple Coneflower, Black-eyed Susan, asters, blazing stars, milkweeds, and many other Michigan natives all go through this transition in different ways.
Some develop obvious seed heads.
Others form pods.
Some produce tiny seeds that are easy to miss unless you know what you are looking for.
This is one reason I encourage gardeners to leave at least some faded flowers standing rather than immediately cutting everything back.
A seed head can become food for birds, shelter for insects, and a source of future plants, all at the same time.
That connection is especially easy to see in The Best Native Plants That Feed Goldfinches, where the value of a flower often increases after blooming ends.
Let the Plant Tell You When It Is Ready
The most important part of seed collecting is patience.
Seeds collected too early may not be mature enough to germinate.
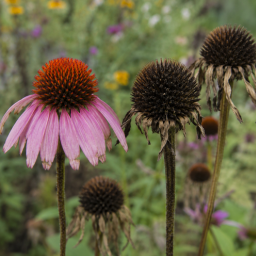
Instead of harvesting as soon as a flower fades, watch for signs that the plant has finished developing its seed.
Depending on the species, you may notice:
- seed heads turning brown or tan
- pods becoming dry and papery
- seeds loosening easily from the plant
- a change from soft or green tissue to something firm and dry
- seeds beginning to fall naturally when the stem is moved
This is where observation becomes more useful than a calendar date.
A plant growing in full sun may ripen differently from the same species in partial shade.
Weather matters too.
A warm, dry stretch can speed the process.
Several rainy days can slow drying and make collection more difficult.
Instead of asking only, “Is it September yet?”
ask,
“What is this plant showing me?”
Choose Healthy Plants
When you decide to collect seed, start with plants that appear healthy and vigorous.
Look for plants that bloomed well and developed strong seed heads.
Avoid collecting from plants that look diseased, unusually weak, or damaged.
If you have several plants of the same species, collecting from more than one can also help preserve a little more genetic diversity.
You do not need to take every seed.
In fact, I would not recommend it.
Leave plenty behind.
Some seeds will feed birds.
Some will fall naturally and produce seedlings where the plant already grows.
Some may never germinate at all, and that is part of the natural cycle.
Seed saving works best when it feels like sharing with the garden, not stripping it clean.
Know What You Are Collecting
Before placing seeds into an envelope or container, make sure you know which plant they came from.
This sounds obvious until several little brown seed heads begin looking remarkably similar.
Labeling at the time of collection is much easier than trying to identify mystery seeds months later.
At minimum, record:
- common name
- botanical name, if you know it
- collection date
- where in the garden it was growing
- anything unusual you noticed about the plant
Those small notes may become surprisingly useful later.
If one patch thrives while another struggles, the difference may help you understand which growing conditions suit that plant best.
Collect on a Dry Day
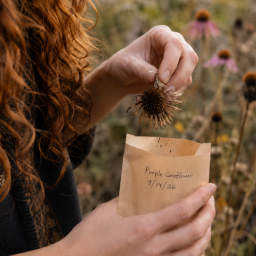
Whenever possible, gather mature seed on a dry day after any morning dew has disappeared.
Wet seed is much more likely to develop mold during storage.
A paper bag or envelope is often more useful than a sealed plastic bag during collection because it allows moisture to escape.
For plants with loose seed heads, you can sometimes hold the bag beneath the plant and gently shake or crumble the dry material into it.
Other plants may be easier to collect by clipping the entire seed head and allowing it to finish drying indoors.
The method will vary.
But the goal stays the same:
collect mature seed and keep it dry.
Saving Seeds Changes the Way You See Fall
Once you begin collecting seeds, late summer and fall become more interesting.
A fading flower no longer looks empty.
A dry pod is no longer something to remove.
You begin noticing texture, timing, shape, and change.
You start wondering what is inside.
And suddenly the garden feels less like it is ending and more like it is quietly preparing.
That may be one of the most rewarding parts of seed saving.
You are not simply storing seeds for spring.
You are learning how the garden carries itself forward.
Cleaning, Drying, and Storing Native Seeds
Once you have collected mature seed, the next step is helping it make the transition from garden to storage without introducing excess moisture, mold, or confusion.
The process does not need to be complicated.
In most cases, careful drying, clear labeling, and appropriate storage are more important than specialized equipment.
Let Seeds Finish Drying
Even if seed heads felt dry when you collected them, it is a good idea to give them additional time indoors before sealing them away.
Spread the material in a single layer on:
- a paper plate
- a shallow cardboard tray
- a sheet of plain paper
- an open paper bag
Keep it somewhere dry and out of direct sun.
Avoid airtight containers during this stage.
The goal is to allow any remaining moisture to escape.
Depending on the plant and weather conditions at harvest, this may take several days or longer.
You are looking for seed that feels fully dry and plant material that is crisp rather than soft.
Separate Seed From Chaff
Some seeds are easy to recognize.
Others arrive mixed with dried petals, stems, husks, and bits of seed head.
That extra material is often called chaff.
You do not need to produce perfectly cleaned seed.
For home seed saving, removing the larger pieces is usually enough.
You can:
- crumble dry seed heads gently between your fingers
- shake material through a coarse kitchen strainer
- pick out larger stems and debris by hand
- pour seed slowly from one container to another and remove the lightest material
The important thing is not perfection.
It is reducing excess plant debris that may hold moisture during storage.
Label Before You Forget
Seed-saving mistakes often happen months after collection.
By January, one small envelope of brown seeds can look very much like another.
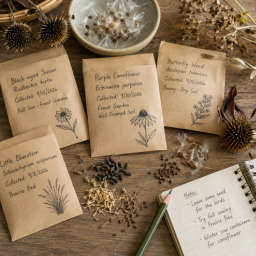
Label everything immediately.
Include:
- common name
- botanical name, if known
- collection date
- collection location
- any notes about color, height, or growing conditions
You may also want to record whether the plant came from seed, a nursery purchase, or an existing population in your garden.
Those details can become useful if you begin propagating more natives over time.
This is also a natural place to connect seed saving with The Michigan Native Garden Journal. Recording where a plant grew well, when it set seed, and how it performed gives you a much stronger starting point the following year. There is a complimentary one month copy of the Michigan Native Garden Journal below. Enjoy!
Choose the Right Storage Container
Once the seed is fully dry, store it in something that keeps it organized and protected.
Paper envelopes work well for many seeds.
Small glass jars can also be useful, but only if you are certain the seed is completely dry before sealing them.
Plastic bags are convenient, but they can trap moisture, so I would use them cautiously unless the seed has dried thoroughly.
Whatever container you choose, keep it clearly labeled.
Then store it in a cool, dark, dry place.
A closet, drawer, or cabinet away from heat sources is often perfectly adequate for seeds that do not require special treatment.
Some Native Seeds Need Winter
This is where native seed saving becomes especially interesting.
Many Michigan native plants are adapted to experience winter before they germinate.
Their seeds may remain dormant until they go through a period of cold, moist conditions.
This process is called cold stratification.
In nature, it happens automatically.
Seeds fall to the ground in late summer or fall.
They experience rain, snow, freezing temperatures, and thawing.
Then, when conditions are right, they germinate in spring.
If you are growing those seeds yourself, you may need to imitate that seasonal cycle.
Two Simple Ways to Cold-Stratify Seed
One option is to sow seeds outdoors in fall or winter and let Michigan weather do the work.
You can use:
- prepared garden soil
- outdoor pots
- milk-jug style winter-sowing containers
- nursery trays protected from disturbance
The other option is refrigerator stratification.
Seeds are mixed with a slightly moist medium, such as sand or vermiculite, then stored cold for the amount of time that particular species requires.
The key word is slightly moist.
The medium should not be dripping wet.
Different species require different lengths of cold treatment, and some do not require stratification at all.
That is why it is worth checking the germination requirements for each species rather than treating every native seed the same way.
Do Not Assume Every Seed Will Behave the Same
Native plants have evolved many different germination strategies.
Some seeds germinate readily after drying.
Others need cold.
Some need alternating warm and cold periods.
A few may need scarification or other treatments.
That variation is not a flaw.
It is part of how native plants avoid having every seed germinate at exactly the same time.
If one spring is unusually harsh, some seeds may remain dormant and try again later.
For the gardener, this means patience matters.
A seed that does not germinate immediately is not always a failed seed.
Avoid the Most Common Mistakes
Most seed-saving problems come down to a few simple issues.
Avoid:
- collecting immature seed
- storing seed before it is fully dry
- forgetting to label containers
- assuming every native needs the same treatment
- taking every seed from the garden
- throwing seed away too quickly because it did not germinate right away
Seed saving becomes easier once you stop expecting every species to behave like a vegetable garden annual.
Native plants often move at their own pace.
Keep Some Seed in the Garden
Not every seed needs to come indoors.
In fact, one of the best things you can do is leave plenty behind.
Those seeds may:
- feed birds
- fall naturally into the soil
- germinate near the parent plant
- move to another part of the garden
- become part of the winter landscape
That balance matters.
Saving seed gives you more possibilities.
Leaving seed gives the garden some too.
Giving Your Saved Seeds a New Beginning
By the time you have collected, dried, cleaned, and labeled native seed, you have already done something remarkable.
You have carried a small piece of one growing season forward into the next.
Now comes the question:
Where should those seeds go?
There is no single right answer.
Some may return directly to the garden. Others may begin in containers where you can watch them more carefully. Some might eventually become plants you share with a friend or use to establish an entirely new part of your landscape.
Sow Some Seeds Directly
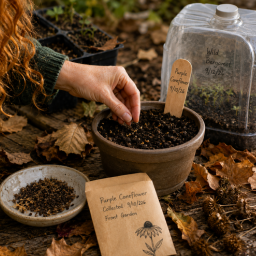
For many native species, sowing outdoors in fall can be one of the simplest approaches.
The seeds experience Michigan winter naturally—cold, moisture, freezing, thawing, and eventually warming spring soil.
Choose an area that matches the plant’s preferred growing conditions and prepare the soil so the seed can make contact with the ground.
Avoid burying seed deeply unless the species specifically requires it. Many native wildflower seeds naturally fall onto or very near the soil surface.
And then mark the area.
It is surprisingly easy to forget what you planted by spring.
Use Containers When You Want More Control
Starting seed in pots, nursery trays, or winter-sowing containers can make young seedlings easier to recognize and protect.
Containers are particularly helpful when:
- you have only a small quantity of seed
- you want to keep species separated
- the garden already contains many emerging seedlings
- you are not yet sure where the new plants will ultimately go
Once seedlings are large enough to handle, they can be moved into the garden where they have room to mature.
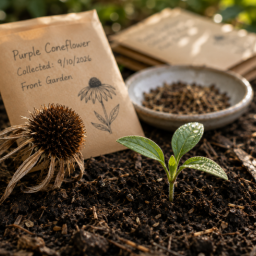
Just remember that native seedlings can be small at first.
Their first priority is often developing roots rather than producing the impressive growth we see in established plants.
Let Seed Help You Expand Slowly
One of the greatest advantages of saving seed is that you do not have to create an entire native garden at once.
Perhaps you want to widen an existing planting bed.
Fill a gap where something did not survive.
Add more plants of a species that performed especially well.
Create a small new pollinator area.
Or begin replacing another section of lawn.
Saved seed gives you options without requiring another trip to the nursery for every plant.
Over several years, those small additions can completely change the character of a garden.
Share Some of What You Grow
Native seed can also become something worth sharing.
If you have more than you need, seeds or young plants can be passed along to friends, neighbors, or other gardeners who are interested in growing Michigan natives.
Just be certain that the plant has been correctly identified before sharing it.
And whenever possible, share what you have learned along with the seed:
Where did the plant grow well?
How much sun did it receive?
Was the soil dry or moist?
Which pollinators visited it?
A packet of seeds becomes much more useful when it comes with a little knowledge.
Allow the Garden to Sow Itself Too
There is another option that requires almost no work at all.
Leave some seeds exactly where they are.
Native plants have been reproducing without our help for a very long time.
When seed heads remain standing, seeds can gradually fall around the parent plant and find their own way into the soil.
Some will disappear.
Some will feed wildlife.
Some will never germinate.
And every so often, a tiny new plant will appear somewhere you did not put it.
Those volunteers can become some of the most delightful surprises in a native garden.
Before removing one, give yourself time to discover what it might become.
Seed Saving Is an Exercise in Patience
Growing native plants from seed teaches a different kind of gardening.
It asks us to stop expecting immediate results.
Some seeds germinate quickly.
Others wait.
Some seedlings grow vigorously during their first year.
Others remain surprisingly small while developing the roots that will eventually support them.
And sometimes the seed appears to do nothing at all, until another season arrives.
That uncertainty is part of the experience.
You are working with a living system rather than following a guaranteed formula.
Barbara’s Observation
There is something hopeful about holding seeds collected from your own garden.
They are so small compared with the plants they may someday become.
A handful of seeds can contain next year’s flowers, future visits from bees and butterflies, food for birds, and plants that may eventually produce thousands of seeds of their own.
But none of that is visible yet.
For now, there is simply possibility.
Seed saving reminds me that gardens are always working a little farther into the future than we can see.
And perhaps that is one reason autumn never really feels like an ending.
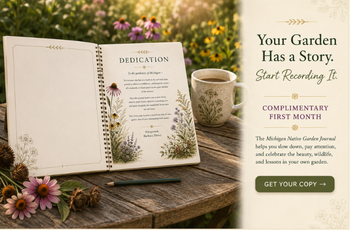
Your Garden Has a Story. Keep Recording It.
Seed saving gives you another fascinating chapter to follow.
Which plants produced seed first?
Which seeds did you collect?
Where did you sow them?
And what eventually emerged?
The complimentary first month of The Michigan Native Garden Journal gives you a place to begin recording those observations so that next year’s garden can teach you even more.
COMPLIMENTARY FIRST MONTH
The Michigan Native Garden Journal
↓ GET YOUR COPY ↓
Observe • Discover • Wonder • Grow.
Keep Exploring
Continue following the seasonal story of your garden:
- The Best Native Plants That Feed Goldfinches
- How to Prepare Michigan Native Plants for Winter
- How to Use Native Grasses in Your Michigan Garden
- Why Your Native Garden Gets Better Every Year
For species-specific seed collection and germination information, trusted resources such as Wildflower Association of Michigan and Michigan State University Extension can help you determine whether a particular native requires cold stratification or another germination treatment.
What’s Next
You do not need to save every seed your garden produces.
Begin with one plant you know well.
Watch its flower become a seed head.
Wait until the seed is mature.
Collect a little.
Leave plenty behind.
Label what you save, learn what that particular species needs, and see what happens next year.
That first seedling grown from a plant already living in your garden may change the way you look at every fading flower that follows.
Coming Next
There is something almost magical about stepping into the garden early in the morning and seeing every leaf, petal, and blade of grass touched with tiny beads of water.
In the next Nature Notes, Why Morning Dew Is One of the Garden’s Greatest Gifts, we’ll look more closely at what dew is doing in the garden, who benefits from it, and why one of nature’s quietest daily events is worth noticing.